Key Takeaways
- Install Unity Hub, an LTS Version, and Visual Studio before starting your project.
- Use Unity’s 2D Tilemap system to build levels faster.
- Create movement and jumping mechanics using Unity 2D game programming.
- Build character animations with the Animation Window and Animator Controller.
- Design menus and score systems with UI Canvas.
- Export your finished game for PC, Android, or iOS.
If you’ve been searching for how to make a game in Unity, there has never been a better time to start. Unity continues to be one of the most popular game engines for beginners, indie developers, and professional studios alike. Our Unity vs Unreal Engine for Indie Developers guide explores which platform offers the best balance of accessibility, flexibility, and scalability for independent teams.
According to Unity’s 2025 Gaming Report, the company gathered insights from nearly 5 million developers worldwide, making Unity one of the largest game development ecosystems in the industry.
The popularity of 2D games also remains strong. Unity’s 2026 Game Development Report found that 73% of surveyed studios were developing casual games, a category that includes platformers, puzzle games, endless runners, and many other 2D genres.
In this guide, you’ll learn how to create a 2D game in Unity from scratch. By the end of this guide, the best 2D game engines in 2026 will include your game as well.
Why Unity Is a Great Choice for First-Time Game Developers
Unity’s Position in the Game Development Industry
Which one are the top game development engines for beginners? Unity has spent years building a reputation as one of the most flexible game engines available.
The engine also remains popular among indie developers. More than 15,000 games were released on Steam during 2025, and indie projects contributed roughly $4.4 billion in Steam revenue. If you’re still deciding which engine to learn, our detailed comparison of Unity vs Unreal Engine breaks down the strengths, limitations, and ideal use cases for both platforms.
“Many successful games start with a simple prototype. Focus on creating a solid gameplay loop first, then improve visuals, features, and content over time. Strong fundamentals almost always outperform unnecessary complexity.”
[blog_cta]
Gaming Industry Snapshot
| Metric | 2025 Value |
| Global Gaming Revenue | $188.8 Billion |
| Mobile Gaming Revenue | $103 Billion |
| Mobile Revenue Share | 55% |
| Mobile Gamers Worldwide | Nearly 3 Billion |
| Steam Game Releases | 15,000+ |
| Indie Revenue on Steam | $4.4 Billion |
Understanding the Unity Interface Before Building Your Game

Many beginners rush directly into building mechanics. That often leads to confusion. Spending ten minutes learning the interface saves hours later.
Many beginners start with 2D projects because they require fewer assets and simpler production pipelines. If you’re still evaluating which direction to pursue, our guide on 2D vs 3D game development explains the differences in scope, cost, and development complexity.
Scene View
The Scene View is where development happens. Think of it as your workspace. You place objects, build levels, move characters, and organize environments here.
Everything you create appears first in the Scene View.
Game View
The Game View shows exactly what players see. Whenever you press the Play button, Unity simulates your game inside this window.
You will constantly switch between Scene View and Game View during development.
Hierarchy
Think of the Hierarchy as the list of everything inside your game world. Player characters, enemies, cameras, platforms, backgrounds, and UI elements all appear here.
As projects grow, the Hierarchy becomes one of the most important organizational tools inside Unity.
Inspector
Whenever you select an object, the Inspector displays its properties. Position, scale, physics settings, animations, scripts, and visual components all appear here.
Most gameplay adjustments happen inside the Inspector.
Project Window
The Project Window stores every asset used in your game.
Sprites, audio files, animations, scripts, prefabs, and materials all live here. A well-organized Project Window makes development significantly easier.
If you’re following any Unity engine 2D tutorial, you’ll spend most of your time moving between these five areas. Now it’s time to build your game.
Step 1. Create Your First 2D Scene
Every game starts with a playable environment.If you’re curious about how characters, environments, animations, and UI elements are created, our guide on the game asset creation process walks through the complete production pipeline.
Setting Up Your Main Character
Inside the Hierarchy, right-click and select:
- Create Empty
- Rename the object “Player.”
- Next, add a Sprite Renderer component.
- For now, choose a simple square sprite.
Professional games often begin with placeholder assets before artists create final visuals. This approach helps developers focus on gameplay first.
Adding Sprites
Sprites are the visual building blocks of 2D games. A sprite could be:
- A character
- A platform
- A coin
- A background
- An enemy
Create a second square sprite and stretch it horizontally. Place it beneath your player object.
This becomes your first platform. Then add a simple background image behind the scene. You now have the foundation of a playable level.
Organizing Game Objects
Good organization prevents problems later. Create folders for:
- Sprites
- Scripts
- Animations
- Audio
- Prefabs
Step 2. Add Movement Using Unity 2D Game Programming
Movement is often the first mechanic developers build because it immediately turns a static scene into something interactive. Once players control a character, the project starts feeling like a real game.
Create a Player Script
Inside your Scripts folder, create a new C# script called PlayerMovement. Attach the script to your Player object.
This script becomes the brain behind your character’s actions. Think of scripts as instructions.
Every time a player presses a key, clicks a button, or collides with an object, a script decides what happens next. For example, your movement script will eventually tell Unity:
- Move left when the left arrow key is pressed
- Move right when the right arrow key is pressed
- Stop moving when no key is pressed
Understand Rigidbody2D
Before adding movement code, select your Player object and add a Rigidbody2D component. This component allows Unity’s physics engine to interact with your character.
Without Rigidbody2D, your player is nothing more than an image sitting on the screen. Once added, Unity begins tracking:
- Velocity
- Gravity
- Collisions
- Forces
Most Unity 2D game programming relies heavily on Rigidbody2D because it handles much of the physics work automatically.
Add Keyboard Controls
Now create movement controls using horizontal input. The logic works like this:
- Detect player input.
- Determine direction.
- Apply movement.
- Update position.
Step 3. Build Platforms and Levels with the 2D Tilemap System
What Is a 2D Tilemap?
A 2D Tilemap is Unity’s system for building levels quickly using reusable tiles. Instead of placing hundreds of individual sprites manually, you paint environments using tile pieces.
Think of it like digital LEGO. You create a set of tiles and then assemble them into larger environments.
Creating Ground Tiles
Inside Unity:
- Create a Grid object
- Add a Tilemap component
- Open the Tile Palette window
- Import your tile sprites
- Begin painting platforms
Create:
- A floor section
- Two elevated platforms
- One floating platform
- A simple endpoint
Avoid creating a massive level immediately. Professional developers often prototype levels quickly before refining them.
Designing Your First Playable Level
A common mistake beginners make is designing levels that look good but don’t play well. Good levels teach players gradually. For example:
- Level 1 introduces movement.
- Level 2 introduces jumping.
- Level 3 combines movement and jumping.
Many successful indie platformers follow this exact approach. Games such as Celeste and Hollow Knight continuously introduce mechanics in small, manageable steps. That philosophy works for beginners too.
Step 4. Add Jumping and Basic Physics
Movement feels good. Jumping makes it feel like a platformer.
Configure Gravity
Since your player already uses Rigidbody2D, gravity is available by default. Press Play and watch your character fall.
If gravity feels too weak or too strong, adjust the Gravity Scale value. Small changes make a huge difference. Many famous platformers use custom gravity settings rather than default values.
Create Jump Controls
Add a jump action triggered by the spacebar. The basic process works like this:
- Player presses Space
- Unity detects input
- Upward force is applied
- Character leaves the ground
- Gravity pulls the character back down
Simple. Yet this single mechanic creates countless gameplay possibilities.
Prevent Double Jump Errors
One of the most common beginner mistakes occurs when players jump infinitely. The fix is straightforward. Create a ground-check system.
Before allowing a jump, Unity verifies that the player is touching the ground. If the player is airborne, jumping remains disabled. Most platformers use this method because it creates predictable controls.
Step 5. Create Character Animations
A moving character is functional. An animated character feels alive. Even simple animations improve player feedback dramatically.
Using the Animation Window
Unity’s Animation Window allows you to create frame-by-frame animations. Open the Animation Window and create your first animation clip.
Start with an idle animation. This animation plays when the player stands still. The goal isn’t perfection. The goal is feedback. Players should instantly understand the state of their character.
Setting Up an Animator Controller
Next, create an Animator Controller. The Animator Controller manages transitions between different animations.
Think of it as a traffic controller. It decides which animation should play and when. For example:
- Standing still = Idle
- Moving = Walk
- Airborne = Jump
Step 6. Add Coins, Obstacles, and Enemy Objects
At this point, your project has the core elements of a platformer. The player can move, jump, and navigate through a level. While that might sound like a complete game, players still don’t have a meaningful objective. They can move around the environment, but there is nothing encouraging them to explore, take risks, or improve their performance.
This is where collectibles, obstacles, and enemies become important.
Creating Collectibles
Coins are often one of the first collectibles developers implement because they introduce reward systems in a straightforward way.
Start by creating a simple coin sprite and placing several copies throughout your level. Try positioning some coins directly on the player’s path while placing others in locations that require more effort to reach. A coin floating above a difficult jump immediately creates a small decision for the player. Do they continue moving forward, or do they attempt the challenge for an extra reward?
This approach teaches an important lesson about game design. Players enjoy feeling rewarded for exploration.
Once your coin objects are placed, add a Collider2D component and enable the “Is Trigger” option. This allows Unity to detect when the player touches the coin without creating a physical collision.
When the player collects a coin, several things should happen:
- The coin disappears
- The score increases
- A sound effect plays
- Visual feedback confirms the collection
Using Colliders
Colliders are one of the most important systems in Unity 2D game development services because they determine how objects interact with one another.
Every platform, enemy, wall, collectible, and hazard in your game relies on colliders in some way. Without them, your character would fall through platforms, enemies would never detect player contact, and collectibles would become impossible to pick up.
As your project grows, you’ll begin using different collider types for different situations. Some objects require physical collisions, while others only need trigger events. Understanding the difference early will save you considerable debugging time later.
Step 7. Build Your User Interface
A player should never have to guess what’s happening.
They should know how much health remains. They should know how many coins they’ve collected. They should know whether they’ve won, lost, or reached an objective.
That information comes from the user interface.
Many beginners focus heavily on gameplay systems and leave the UI until the end of development. Professional teams often take the opposite approach. They understand that even great mechanics become frustrating when players don’t receive clear feedback.
Unity makes interface creation relatively straightforward through the UI Canvas system.
Create a UI Canvas
The UI Canvas acts as the foundation for every interface element in your game.
Think of it as a separate layer that sits above your gameplay world. Anything placed inside the Canvas remains visible to the player regardless of where the camera moves.
Most games use the Canvas to display information such as health bars, score counters, timers, menus, inventory systems, and notifications.
This becomes especially useful if you eventually decide to publish your game on mobile devices.
Add a Score Counter
Your score system should connect directly to the collectibles you created earlier.
Whenever a player picks up a coin, the score displayed on screen should update immediately. While this sounds like a small detail, it has a surprisingly large impact on player engagement.
People naturally respond to visible progress. Seeing a score increase reinforces the idea that their actions matter.
For this reason, score systems have remained popular across countless genres, from arcade games and platformers to racing games and puzzle titles.
Display Health
Health systems serve a different purpose.
While scores track progress, health communicates danger.
The moment a player takes damage, they should understand the consequences immediately. If health drops from 100 to 75, that change should be visible without requiring the player to search through menus or settings.
Step 8. Add Sound Effects and Background Music
A surprising number of beginner developers underestimate the role of audio.
They spend hours refining movement, building levels, and adjusting animations, then add sound during the final stages of development. The result is a game that works technically but feels unfinished. Players may not consciously notice every sound effect, but they immediately notice when audio is missing.
Good audio design improves communication.
It also improves immersion.
Audio Sources
Unity handles sound through a component called Audio Source.
An Audio Source acts as a speaker inside your game world. Whenever you want an object to play a sound, whether it’s a player, coin, enemy, or menu button, you’ll typically attach an Audio Source component to that object.
For example, when a player collects a coin, the game can instantly play a collection sound. When the character jumps, Unity can trigger a jump effect. These small moments of feedback make controls feel more responsive and satisfying.
As you continue working with Unity 2D game development, you’ll discover that audio is often tied directly to gameplay systems. A sound effect isn’t simply decoration. It provides information.
Players learn from sound.
Importing Music
Sound effects handle moment-to-moment feedback, but music shapes the overall mood of your game.
A relaxing puzzle game often uses calm background tracks. Fast-paced platformers typically rely on energetic music that encourages movement and momentum. Horror games use audio differently, building tension and uncertainty through subtle sound design.
Importing music into Unity is straightforward. Simply drag your audio file into the Project window and assign it to an Audio Source component. Most developers place background music on a dedicated object that exists throughout the level.
When selecting music, think about how you want players to feel.
The best game soundtracks support gameplay rather than competing with it.
Common Audio Mistakes Beginners Make
Audio issues are among the easiest problems to fix, yet they appear in countless first projects.
Some of the most common mistakes include:
| Common Audio Mistake | Why It Creates Problems |
| Music volume is too high | Players struggle to hear important sound effects |
| No sound feedback for actions | Gameplay feels less responsive |
| Every sound plays at the same volume | Important events lose impact |
| Multiple sounds overlap excessively | Audio becomes distracting |
| Poor-quality audio files | The game feels less polished |
The gaming industry has become increasingly competitive. Mobile gaming generated approximately $103 billion in revenue during 2025, and players have more choices than ever before. Small details such as audio quality often influence how professional a game feels during the first few minutes of play.
Step 9. Test and Fix Your Game
Many beginners think development ends when a game becomes playable. In reality, testing is where some of the most important improvements happen.
A game may look complete on the surface, but small bugs, performance issues, and design problems often appear once people start interacting with it in unexpected ways.
Testing helps you find those issues before your players do.
Create a Playtesting Routine
One of the best habits you can develop is testing your game after every major change.
If you add a new movement mechanic, test it.
- If you redesign a level, test it.
- If you modify your UI, test it.
Frequent testing makes debugging much easier because you can quickly identify what caused a problem.
A useful playtesting checklist might include questions such as:
- Does the character move smoothly?
- Do jumps feel consistent?
- Are all collectibles working correctly?
- Can players complete the level?
- Does the score update properly?
- Do enemies behave as expected?
- Are menus functioning correctly?
Step 10. Export and Publish Your First Game
Reaching this stage is a major accomplishment. Many people start learning game development. Far fewer finish a complete project.
Exporting your game allows you to share your work with friends, communities, and potential players. More importantly, it teaches you how the final stages of game development work.
Build for PC
PC is often the easiest platform for first-time developers.
Unity allows you to generate standalone builds for Windows, macOS, and Linux directly through the Build Settings menu.
After selecting your target platform, Unity compiles the project into an executable file that players can run without opening the Unity editor.
The first time you launch your game outside Unity is memorable. Your project stops feeling like a classroom exercise. It starts feeling like a product.
Build for Android
Android remains one of the largest opportunities for indie developers.
Mobile gaming reached nearly 3 billion players worldwide in 2025, making smartphones one of the most accessible gaming platforms in history.
To publish on Android, you’ll need to install Android Build Support through Unity Hub and configure the required settings.
Once completed, Unity generates an APK or Android App Bundle that can be tested on physical devices.
Testing on real hardware is essential. A game that runs smoothly on your computer may behave differently on a phone.
Build for iOS
Publishing for iOS follows a similar process, although additional requirements exist.
Developers need access to Apple’s development ecosystem, including Xcode and an Apple Developer account.
While setup takes longer than Android, publishing on iOS gives developers access to a massive audience across iPhones and iPads.
For developers interested in mobile game development services, understanding both Android and iOS deployment is an important skill.
Common Mistakes First-Time Unity Developers Make
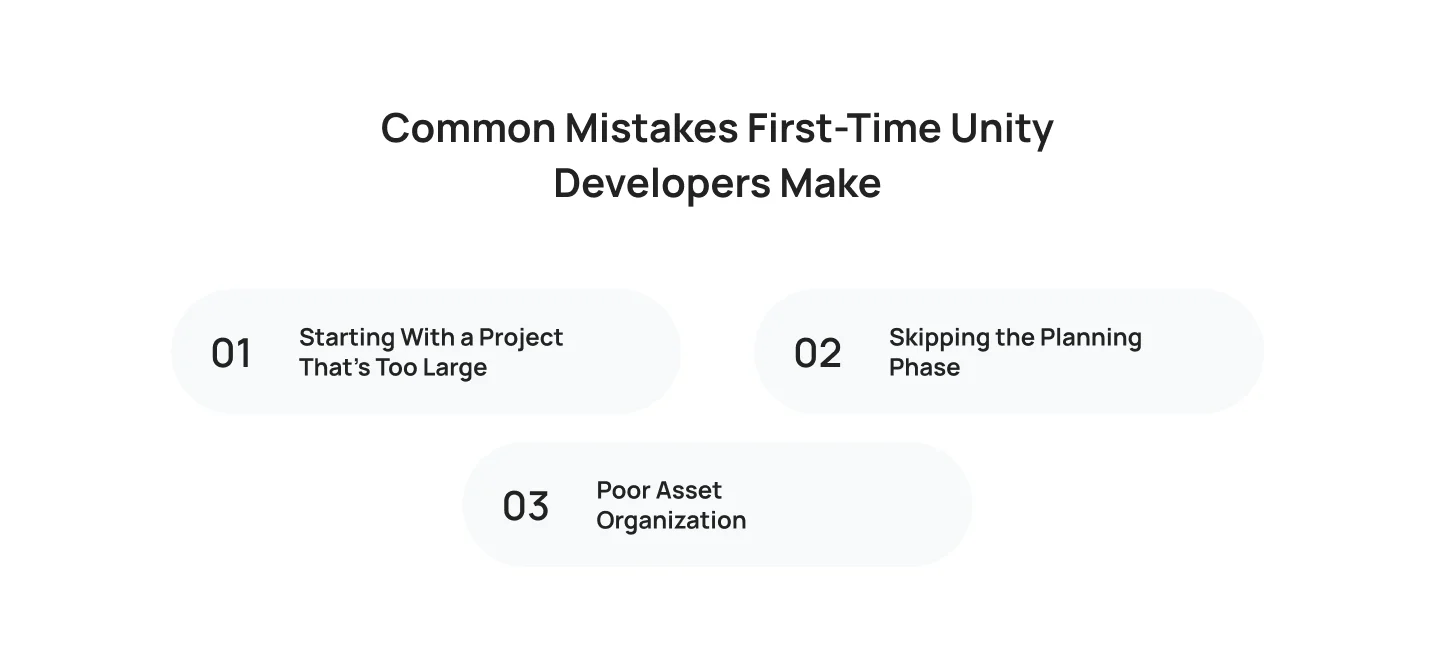
Starting With a Project That’s Too Large
One of the most common mistakes beginners make is choosing a project that’s far beyond their current experience level.
A simple platformer may sound less exciting than an open-world RPG or multiplayer survival game, but smaller projects provide a much better learning experience. They allow you to focus on core development skills without becoming overwhelmed by systems, content creation, balancing, networking, and optimization.
Scope management is a challenge even for professional studios. Research examining more than 23,000 Steam games found that nearly half experienced development delays during production. If experienced teams struggle with scope, it’s easy to see why first-time developers often do as well.
Starting small doesn’t limit your potential. It increases your chances of finishing.
Skipping the Planning Phase
Many beginners jump straight into Unity and start building mechanics without defining what they’re trying to create.
The result is usually a project that changes direction every few days. New features are added, existing systems are replaced, and development slows as complexity increases.
A basic game design document doesn’t need to be lengthy. Even a single page outlining your gameplay loop, level structure, progression system, and visual direction provides a roadmap for development.
Poor Asset Organization
Asset management seems unimportant during the early stages of development.
When a project contains only a few sprites and scripts, finding files is easy.
That changes quickly.
As levels, animations, audio files, UI elements, and code begin accumulating, disorganization becomes a serious problem. Developers waste time searching for files, duplicate assets unnecessarily, and introduce errors that could have been avoided with a cleaner structure.
Turn Your Unity Prototype Into a Market-Ready Game With Cubix
As projects grow, developers often face obstacles involving scalability, optimization, multiplayer systems, monetization, art production, quality assurance, and platform publishing. What starts as a simple prototype can quickly become a much larger undertaking.
That’s where Cubix comes in.
“The best way to learn game development is by building something players can interact with. Your first game doesn’t need to be perfect. It needs to teach you how design, technology, and player experience come together.”
Salman Lakhani, CEO, Cubix
With years of experience delivering custom games across mobile, PC, console, and emerging platforms, this 2D art development company helps studios, startups, and entrepreneurs transform ideas into polished products.
Cubix Games has worked on projects spanning casual games, multiplayer experiences, educational products, and large-scale entertainment applications.
[blog_cta 2]
Frequently Asked Questions
1. Is Unity good for beginners in 2026?
Yes. Unity remains one of the most beginner-friendly game engines available. Its extensive documentation, large community, visual editor, and cross-platform capabilities make it an excellent choice for first-time developers. Many professionals also use Unity, so the skills you learn remain valuable as you progress.
2. How long does it take to build a simple 2D game in Unity?
A basic 2D platformer can take anywhere from a few days to several weeks, depending on the scope of the project and your experience level. Features such as custom animations, enemy AI, multiple levels, and mobile optimization will increase development time.
3. Do I need coding knowledge to create a 2D game in Unity?
Some programming knowledge is helpful, but many beginners learn Unity while building their first project. Understanding basic C# concepts such as variables, functions, and conditions will make the learning process much smoother.
4. What type of 2D games work best in Unity?
Unity supports a wide variety of 2D genres, including platformers, puzzle games, RPGs, endless runners, strategy games, educational games, and mobile titles. Its flexible toolset makes it suitable for both simple and complex projects.
5. Can I publish a Unity 2D game on mobile devices?
Yes. Unity allows developers to export games for Android and iOS using the same project. This is one reason Unity remains popular among studios that offer mobile game development services and independent developers targeting mobile audiences.
6. What is the difference between Unity 2D and Unity 3D development?
Unity 2D development focuses on sprites, Tilemaps, 2D physics, and side-scrolling or top-down gameplay. Unity 3D development uses three-dimensional models, environments, cameras, lighting systems, and physics simulations. The core Unity workflow remains similar, but the assets and design approaches differ significantly.
7. Can a beginner build a commercial game in Unity?
Yes, although commercial development typically requires additional skills beyond programming. Areas such as game design, art production, testing, marketing, and monetization all contribute to a successful launch. Many developers begin with small projects before expanding into larger commercial releases.
8. Should I build everything myself or work with a game development company?
For learning purposes, building a game yourself is one of the best ways to understand the development process. However, commercial projects often require expertise across multiple disciplines. Working with experienced teams such as Cubix can help accelerate development.