Key Takeaways
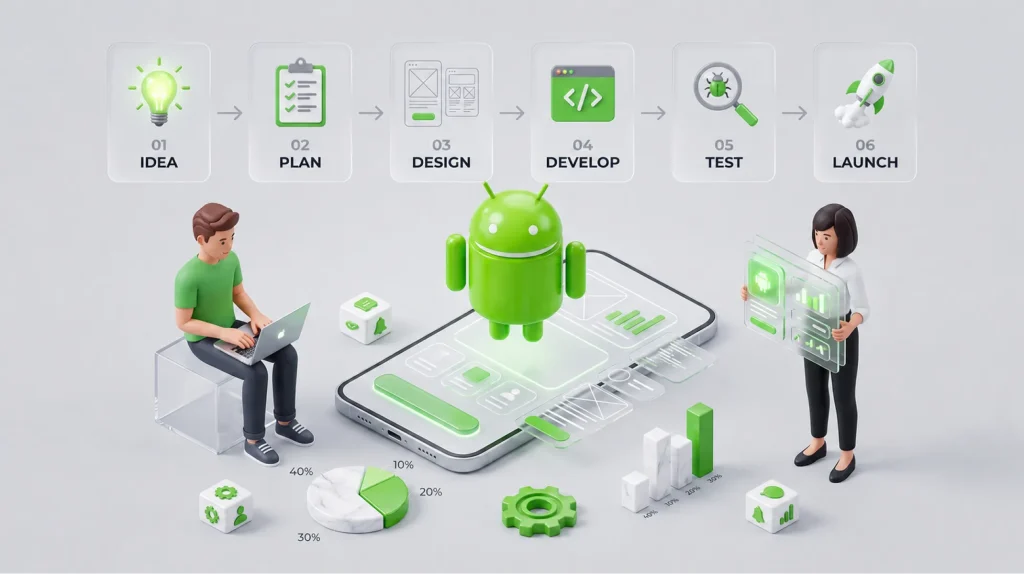
- The Android app development process includes planning, design, development, testing, launch, and ongoing improvement.
- Requirements gathering and early technical planning help manage Android App Development Cost and prevent scope changes.
- UI UX design, frontend development, backend development, and API integration must work together to create a smooth user experience.
- The decision between Kotlin vs Java affects code quality, developmefnt speed, and future maintenance.
- Post-launch updates, user feedback, and Android app development trends help an application remain useful and competitive.
Introduction
Android is one of the most widely used mobile platforms, making it an important channel for businesses that want to reach customers through smartphones and tablets. From eCommerce and healthcare to banking, logistics, education, and entertainment, Android apps support a wide range of customer-facing and internal business needs.
However, building an app involves more than coding and publishing it on the Google Play Store. The Android app development process includes research, planning, UI UX design, technical decisions, development, testing, deployment, and ongoing maintenance.
A structured Android app development lifecycle helps businesses control scope, reduce technical risks, and create applications that solve real user problems. This guide explains each stage, from the first idea to launch and post-launch growth.
What Is the Android App Development Lifecycle and How Does It Work?
The Android app development lifecycle is a connected process where every stage affects the next. Poor planning can cause design changes later, while weak testing can lead to performance issues and negative user reviews after launch.
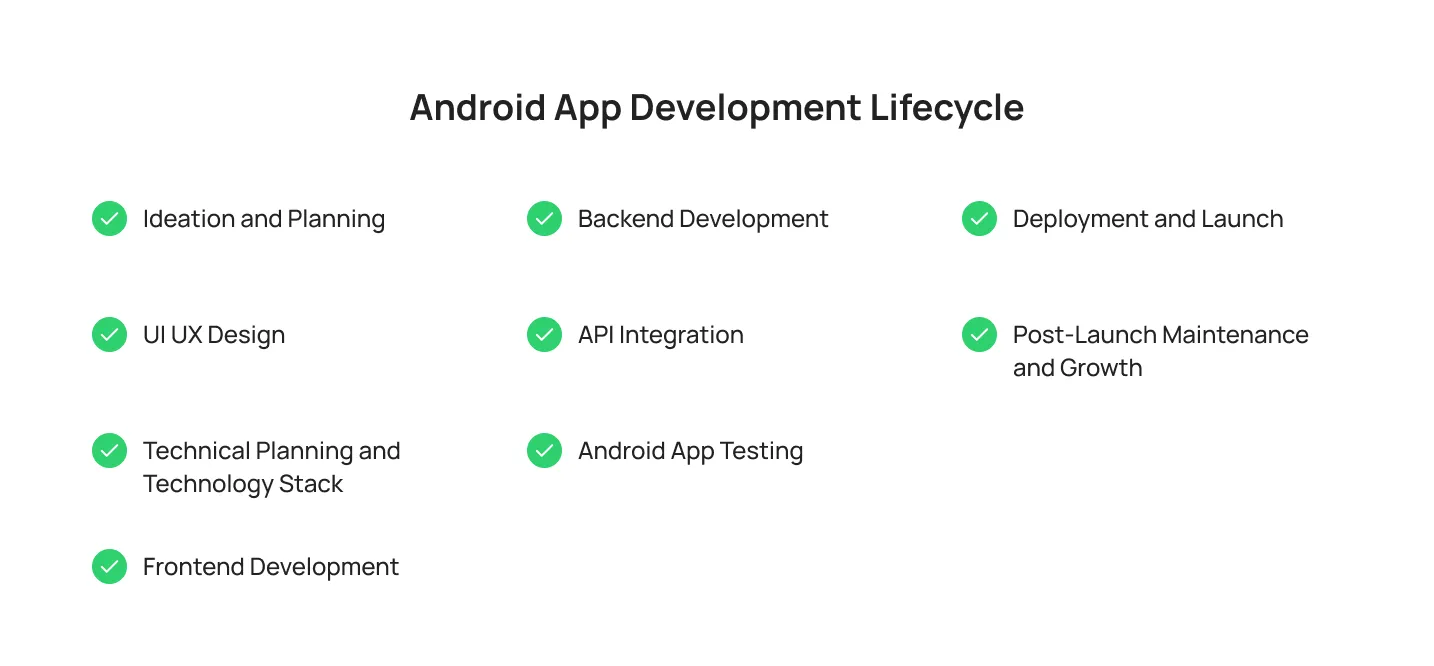
A typical Android app development roadmap includes:
- Ideation and planning
- UI UX design
- Technical planning and technology selection
- Frontend development
- Backend development
- API integration
- Android app testing
- Deployment and launch
- Post-launch maintenance and improvement
Following these Android app development steps gives teams a clear direction and helps them build a reliable app with fewer avoidable issues.
Phase 1: Ideation and Planning
The first phase focuses on validating the app idea and defining the problem it will solve. Businesses should identify the target audience, research competitors, review user feedback on similar apps, and determine what makes their solution useful.
This stage also includes requirements gathering. Teams document the app’s core features, user roles, business goals, security needs, and performance expectations. The first version should focus on a minimum viable product, or MVP, with only the features needed to solve the main user problem.
Early planning is also the right time to estimate Android App Development Cost. Costs depend on the number of features, design complexity, backend requirements, integrations, security needs, and testing scope. Businesses can better understand the wider planning process through Android app development.
Why This Step Is Important:
A clear plan prevents teams from building unnecessary features, reduces scope changes, and helps create a realistic timeline and budget. It also ensures the app is based on actual user needs rather than assumptions.
Phase 2: UI UX Design
UI UX design defines how the app looks and how users interact with it. UI includes layouts, buttons, icons, colors, and typography. UX focuses on how easily users can navigate the app and complete tasks.
The process usually begins with wireframes, which outline the structure of each screen. Designers then create prototypes that allow stakeholders to test user flows before development begins. User flow mapping helps identify how users will move through key tasks, such as signing up, making a purchase, booking a service, or tracking an order.
Android apps should also follow Material Design principles for navigation, accessibility, touch targets, spacing, and visual feedback.
Why This Step Is Important:
Good UI UX design reduces confusion and makes the app easier to use. It improves user satisfaction, supports higher retention, and helps prevent costly design changes after development has started.
Phase 3: Technical Planning and Technology Stack
Technical planning defines how the Android app will be built. This includes choosing programming languages, frameworks, architecture patterns, databases, cloud services, and security measures.
One of the most common decisions is Kotlin vs Java. Kotlin is widely considered the best language for Android app development for new projects because it is modern, concise, and officially supported by Google. Java remains useful for legacy apps and existing Java-based systems.
Teams also choose an architecture pattern, such as MVVM, to separate the user interface, business logic, and data layers. This makes the app easier to test, update, and maintain.
Technical planning also affects Android App Development Cost. Custom features, real-time functionality, advanced security, and complex integrations can increase development effort. Businesses that need technical guidance can work with a reliable Android app development agency to define a suitable technology stack and architecture.
Why This Step Is Important:
The right technology choices reduce development issues, improve app performance, and make future updates easier. Poor technical planning can lead to expensive rework, weak security, and maintenance challenges.
Phase 4: Frontend Development
Frontend development turns approved designs into functional app screens. It includes the parts users see and interact with, such as dashboards, forms, menus, product pages, search features, notifications, and account settings.
Developers use Kotlin or Java and Android development tools to build responsive layouts that work across different devices. They implement navigation, interactive elements, loading states, animations, and data displays.
Because Android devices vary in screen size, operating system version, and hardware capability, developers must test layouts and interactions across multiple devices.
Why This Step Is Important:
Frontend development shapes the daily user experience. A responsive, consistent, and easy-to-use interface helps users complete tasks quickly and creates a stronger impression of the app.
Phase 5: Backend Development
Backend development manages the systems users do not see but rely on. It handles data storage, user accounts, business rules, authentication, notifications, and communication with external services.
For example, a food delivery app uses backend systems to store menus, manage orders, process payments, calculate delivery charges, and send updates. The Android app displays this information, while the backend processes and manages it.
Businesses may use custom servers, databases, cloud infrastructure, or platforms such as Firebase. The right approach depends on the app’s complexity and future growth requirements.
Why This Step Is Important:
A reliable backend keeps the app secure, stable, and capable of managing user data. It also supports features such as real-time updates, account management, payments, and notifications.
Phase 6: API Integration
APIs allow the Android app to connect with backend systems and third-party services. They are used for payment gateways, maps, social login, analytics, weather updates, customer relationship management tools, and other external platforms.
For example, a ride-hailing app may use APIs for maps, route calculations, live driver locations, and payment processing. Developers must consider security, response times, error handling, usage limits, and API reliability.
Why This Step Is Important:
API integration allows businesses to add useful features without building every system from scratch. Well-managed APIs improve functionality, reduce development time, and help the app connect with essential external services.
Phase 7: Android App Testing
Android app testing ensures that the app works correctly before users download it. Testing should happen throughout development instead of only at the end.
Common testing types include unit testing, integration testing, UI testing, performance testing, and User Acceptance Testing. Teams should test the app across different Android devices, operating system versions, screen sizes, and network conditions.
Bug fixing is an iterative process. Teams identify issues, prioritize them based on severity, resolve them, and test again before release.
Why This Step Is Important:
Testing helps identify bugs, performance issues, security risks, and compatibility problems before they affect users. It reduces negative reviews and improves the app’s overall reliability.
Phase 8: Deployment and Launch
After testing is complete, the app is prepared for release on the Google Play Store. This includes generating a signed Android App Bundle, configuring permissions, preparing a privacy policy, and creating store assets.
A strong Play Store listing should include a clear title, detailed description, screenshots, an app icon, feature graphics, and relevant keywords. Many teams use a staged rollout to release the app to a smaller group of users before making it available to everyone.
This stage marks the transition from development from idea to launch.
Why This Step Is Important:
A well-managed launch helps businesses identify issues early, protect the app’s reputation, and improve the first experience for new users. A clear store listing also helps users understand the app’s value before downloading it.
Phase 9: Post-Launch Maintenance and Growth
The Android app development process does not end after launch. Teams must monitor crash reports, performance data, user reviews, feature adoption, and security issues.
Regular updates may include bug fixes, new features, performance improvements, design changes, and compatibility updates. User feedback should guide future development decisions.
Businesses should also monitor Android app development trends, including Android operating system updates, AI-powered features, wearable integration, foldable device support, privacy requirements, and accessibility improvements.
Why This Step Is Important:
Ongoing maintenance keeps the app stable, secure, and relevant. It also helps businesses respond to changing user expectations and improve the product based on real-world usage.
Why Businesses Partner With Cubix for Android App Development

Selecting an Android development partner is a strategic decision that can influence product quality, delivery timelines, technical reliability, and long-term maintenance. Businesses need a team that can translate product requirements into a well-structured application while maintaining alignment between user needs, technical feasibility, and business objectives.
Cubix has supported Android app development since 2008 across the full product lifecycle, including discovery, requirements gathering, UI UX design, technical architecture, frontend and backend development, quality assurance, deployment, and post-launch support. This end-to-end approach helps ensure that each stage of development is connected to the broader product strategy.
The team of 350+ skilled developers helps businesses to evaluate key technical decisions, including Kotlin vs Java, app architecture, cloud infrastructure, API integration, security requirements, and testing scope. These decisions are important because they affect application performance, maintainability, user experience, and Android App Development Cost.
For organizations looking for the best Android app development services, Cubix provides structured delivery practices designed to support both early-stage MVPs and more complex Android applications with custom workflows, third-party integrations, real-time functionality, and enterprise-level requirements.
Conclusion
The Android app development lifecycle is a structured process that transforms an idea into a functional, reliable, and maintainable product. It begins with research and requirements gathering, moves through design and development, and continues with testing, launch, and post-launch improvement.
A clear Android app development roadmap helps businesses manage cost, quality, timelines, and user expectations throughout the project. By following each stage carefully, businesses can create Android apps that solve real problems and deliver value long after launch.
Frequently Asked Questions
1. How long does Android app development take?
A simple MVP may take around three to six months. A more complex app with custom backend systems, real-time features, payment processing, and advanced integrations can take longer. Clear requirements and early planning help reduce delays.
2. What is the best language for Android app development?
Kotlin is generally the preferred choice for new Android projects because it is modern, concise, and officially supported by Google. Java remains useful for legacy apps and existing Java-based systems.
3. What affects Android App Development Cost?
The main cost factors include app complexity, features, UI UX design requirements, backend development, third-party integrations, security needs, testing scope, and post-launch maintenance.
4. Why is Android app testing important?
Android app testing identifies bugs, performance problems, compatibility issues, and security risks before users encounter them. It improves stability and creates a better experience across different devices.
5. What tools do I need to get started with developing Android apps?
To get started with developing Android, you’ll need Android Studio, the Android SDK, and a programming language like Kotlin or Java. Many developers also use IntelliJ IDEA because Android Studio is built on it, making the transition easy for developers familiar with the platform.
6. How do Android developers publish an app to the App Store?
After testing and optimizing the application, an Android developer prepares the release build, signs the app, and submits it to the Google Play App Store using the Google Play Console. Before publishing, it’s important to ensure the app meets Google’s quality, security, and policy requirements.