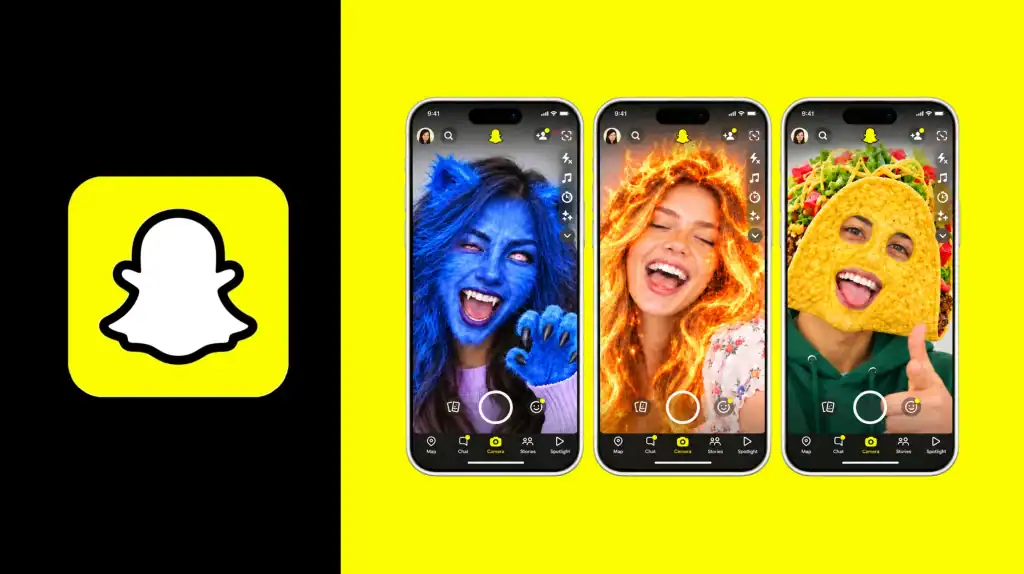
A static Snapchat Lens can change how someone looks, but an animated Lens can make the experience interactive. Imagine a 3D character dancing on someone’s desk, a product that spins when tapped, or a face effect that reacts to an expression. These experiences combine animation, augmented reality (AR), and user interaction to turn a simple camera effect into something people want to explore and share.
The audience for these experiences is substantial. According to Snap’s Snapchat Generation Report, more than 300 million Snapchatters engage with Snap AR on average, and AR Lenses are used 8 billion times per day. That gives creators and brands a reason to explore AR experiences that invite people to do more than look at an effect.
Snap Lens Studio lets you build these experiences with 2D assets, 3D models, animation tools, face tracking, and interactive triggers. This guide walks through creating a custom animated Lens, testing it on a phone, and publishing it on Snapchat.
What You Need Before Creating AR Animations in Lens Studio
Before building an animated Snapchat Lens, prepare your development environment and decide what you want the animation to accomplish. Planning the interaction and choosing the right assets early can save time when you start working with tracking and animation.
Install Lens Studio and Create a Project
Start by downloading Lens Studio, Snap’s development environment for creating AR Lenses. You can begin with a template or create a project from scratch.
If you’re new to AR development, choose a template that matches your intended experience, such as a face effect or a 3D scene. Templates give you a starting structure that you can customize instead of building every element yourself.
Familiarize yourself with the main parts of the workspace:
- Scene Hierarchy: Organizes scene objects and their parent-child relationships.
- Inspector Panel: Displays the properties and components of a selected object.
- Asset Browser: Stores imported models, textures, materials, scripts, and animation assets.
- Preview Panel: Lets you inspect the Lens and check how supported effects behave.
Understanding these areas makes it easier to locate objects, adjust their properties, and troubleshoot animation issues. It’s also worth distinguishing a Snapchat Lens from a standalone mobile app. If your project eventually needs its own screens, accounts, or other app functionality, the broader App Development Guide can help you understand that additional scope.
Prepare Your 2D or 3D Animation Assets
The assets you need depend on the animation you want to create. A simple sparkle effect may require only a texture and particle system, while an animated character may need a 3D model, a rig, and one or more animation clips.
Before importing assets, check the following:
- 3D models: Use a format supported by your Lens Studio workflow and verify the model’s scale, orientation, and geometry.
- Rigged characters: Confirm that the skeleton and animation data are compatible with the intended workflow.
- Textures and materials: Prepare appropriately sized textures and avoid unnecessary high-resolution assets.
- 2D animation: Prepare sprite sheets or animated textures when suitable for the effect.
- Performance: Remove unnecessary geometry, materials, and texture detail before importing assets.
You can create models in Blender and export them in a format supported by Lens Studio. After importing, check the model’s materials, orientation, and animation data before adding more effects.
If your AR project is part of a larger mobile product, choices about asset formats, rendering, and development tools should fit the wider technical stack. The Mobile App Development Technologies guide provides broader context for evaluating those choices.
How to Make Custom AR Animations in Snap Lens Studio?
For this tutorial, imagine creating a 3D object that appears in the camera view, rotates smoothly, and responds when someone taps the screen. This simple example covers the core workflow behind many interactive Snapchat Lenses.
Step 1: Import and Position Your 3D Object
Import your 3D model through the Asset Browser and add it to the scene. Select the corresponding Scene Object to adjust its properties.
Set the object’s position, rotation, and scale so it appears correctly in the camera view. If the model is too large, too small, or facing the wrong direction, fix those issues before creating the animation.
Next, decide how the object should appear in the real world:
- For a floating object, use a suitable world-tracking setup.
- For an object that follows someone’s face, use an appropriate face attachment.
- For an object that should remain attached to a tracked surface, choose a compatible tracking approach.
The tracking method determines how the object behaves as the camera or user moves. Choose it based on the intended experience rather than treating every AR object the same way.
Step 2: Animate the Object’s Transform
Transform animation changes an object’s position, rotation, or scale over time. It’s a useful starting point because you can create movement without rigging a character or animating individual joints.
Lens Studio provides visual animation workflows, although the available tools and interface can vary by version. Check the current animation options in your installed version before following older tutorials.
To create a basic rotation animation:
- Select the object you want to animate.
- Open the appropriate animation workflow and create a transform animation.
- Set the object’s initial rotation at the beginning of the timeline.
- Add a later keyframe with a different rotation value.
- Adjust the animation duration and curve to control the speed and feel of the movement.
- Preview the animation and refine it until the motion looks natural.
For example, you could rotate a product through a full turn so users can see its different sides. You might also animate its scale slightly to create a gentle pulse.
Pay attention to easing. Linear motion maintains a constant rate, while eased motion accelerates or decelerates around keyframes. The right choice depends on whether the object should feel mechanical, playful, or organic.
Step 3: Add an Animation Clip or Character Movement
If you’re animating a rigged character rather than a simple object, you’ll need an appropriate character animation workflow.
An animation clip contains movement data that can be played on a compatible animated model. Depending on how the asset was created, the clip may control skeletal joints, facial blendshapes, or other supported animated properties.
The main animation types include:
- Transform animation: Moves, rotates, or scales an object.
- Joint animation: Changes the pose of a rigged character by animating its skeleton.
- Blendshape animation: Blends between predefined mesh shapes, often to animate facial expressions or other deformations.
- Animated textures: Changes the visual appearance of a surface over time.
A dancing mascot, for example, may use a rigged model with imported animation clips, while a simple product showcase may need only transform animation.
If the character must switch between idle, walking, and dancing states, use an animation state workflow supported by your Lens Studio version. Set up transitions carefully so the character doesn’t jump abruptly between movements.
Not every animation requires code. Visual animation tools can handle many basic movements, while scripts or visual logic can help when playback depends on user input, tracking conditions, or other events.
Step 4: Make the Animation Respond to User Input
An animation becomes more interactive when users can control it. A person could tap a floating sneaker to rotate it, touch the screen to make a character jump, or trigger a visual effect by interacting with the Lens.
To add this behavior, connect a touch or tap event to the animation logic. Depending on the project, you may use visual scripting tools or a script that responds to a supported input event.
A basic interaction follows this sequence:
- Detect the user’s tap.
- Trigger the intended animation or state change.
- Prevent conflicting inputs if the animation is already running.
- Reset or repeat the animation when appropriate.
You can also use trigger events to control when effects appear or disappear. For example, a tap could start a rotation, while a second tap could switch to a different animation.
If you’re writing a script, use the input and event APIs supported by your installed Lens Studio version. Don’t assume an older tutorial’s component names or code will work unchanged in a newer project.
Some projects combine camera interactions with AI-powered functionality in a companion app. For example, a Lens might introduce a product while a separate app provides recommendations or personalized assistance. In that case, relevant AI Features for Mobile Apps may help shape the companion experience, though AI isn’t required for a standard animated Lens.
Step 5: Add Materials, Animated Textures, or Particle Effects
Once the main movement works, refine the appearance of your Lens.
The Material Editor and supported material workflows let you control properties such as color, texture, transparency, and surface appearance. Animated textures can create moving patterns, glowing details, or looping visual sequences.
For more elaborate effects, Lens Studio’s VFX Editor can help you build particle-based visuals. Depending on the effect, particles can create trails, sparks, floating dust, or bursts of light around an animated object.
Keep the effects purposeful. A product animation may benefit from a subtle highlight, while a playful character could use a short particle burst when it jumps. Adding several complex effects without a clear reason can make the Lens harder to understand and more demanding to render.
How to Create Face-Based AR Animations?
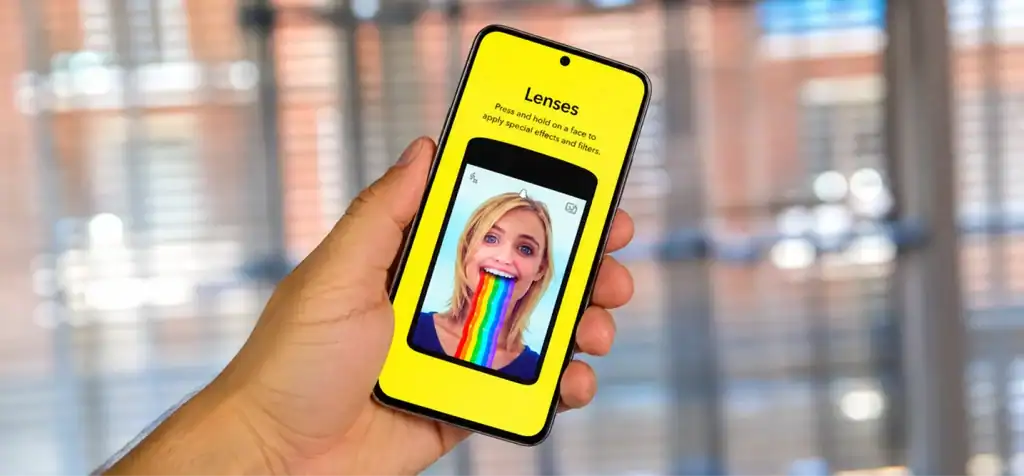
Face-based Lenses attach virtual objects or effects to a person’s face and can respond to facial movement. Follow these steps to create an animated effect that stays aligned with the user’s face and looks natural during movement.
Step 1: Set Up Face Tracking and Head Binding
Start with a Lens Studio project that supports face tracking. Add the appropriate face-tracking setup, then attach your 3D object to the relevant head or face binding so it follows the user’s movements.
For example, if you’re creating animated glasses, position them over the eyes and adjust their rotation and scale. For a small character perched above the forehead, choose an attachment point that keeps it in place as the user turns their head.
Step 2: Add Facial Animation and Occlusion
Once the object follows the face correctly, add animation where needed. Blendshape animation can drive facial expressions or mesh deformations when the model supports them, while a Face Occluder can help virtual objects appear behind parts of the face rather than rendering incorrectly on top.
Test the effect with different expressions and head angles. Make sure the animation doesn’t distort the model or cause objects to drift out of position.
Step 3: Preview and Refine the Effect
Preview the Lens and check how the attachment, animation, and occlusion work together. Adjust the object’s position, scale, and orientation if it slips out of place, and simplify the effect if tracking or rendering becomes unreliable.
If the Lens is part of a larger mobile product, include its integration and testing in your overall release plan. The Mobile App Development Process explains how development, testing, and deployment fit together.
How to Test and Optimize Your Animated Snapchat Lens?
An animation that looks correct in the editor may behave differently on a phone. Tracking conditions, device performance, screen dimensions, and real-world lighting can all affect the final experience.
1. Preview the Lens and Test It on a Real Phone
Use Lens Studio’s preview tools to inspect the animation and check supported tracking scenarios. Then pair the project with Snapchat and send the Lens to your device for testing.
During testing, check:
- Whether the animation starts and stops at the correct time.
- Whether the object stays attached to the intended face or scene position.
- Whether touch interactions respond reliably.
- Whether effects remain visible under different lighting conditions.
- Whether the Lens runs smoothly on the target phone.
Repeat the test after making significant changes to the model, animation, materials, or tracking setup.
2. Fix Common Animation and Performance Problems
| Problem | What to Check |
| Animation doesn’t play | Confirm the animation is configured correctly and its trigger or playback logic is connected. |
| Object appears in the wrong place | Check transforms, parent-child relationships, scale, and tracking setup. |
| Character looks distorted | Verify the rig, skeleton compatibility, and imported animation data. |
| Particle effects stutter | Reduce particle counts and unnecessary rendering work. |
| Lens performs poorly on a phone | Simplify geometry, review texture sizes, and remove unnecessary effects. |
| Tap interaction fails | Check event configuration, script references, and whether another interaction is interfering. |
Optimization is part of the design process, not something to leave until the end. Keep the experience focused on the animation users need to see, and remove assets or effects that don’t improve it.
If you’re also planning a companion app for iOS and Android, decide which parts of the experience can be shared and which require platform-specific work. The Cross-Platform Guide explains the considerations involved in that decision. A Snapchat Lens itself is not automatically a standalone cross-platform app.
How to Publish and Share Your Animated Snapchat Lens?
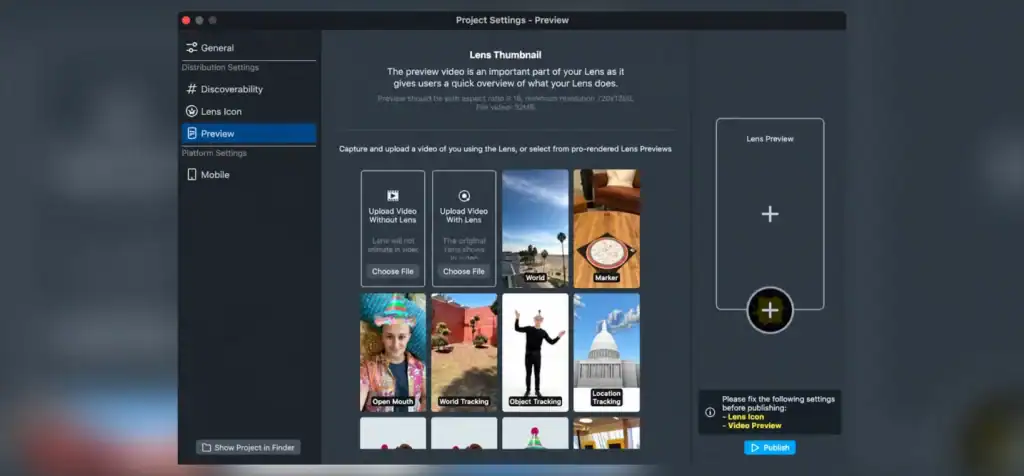
When your Lens works as expected, prepare it for submission. Give it a clear name, choose an appropriate icon, and review the preview so people can understand what the Lens does.
Submit the Lens through Lens Studio and follow the prompts for the applicable review process. Approval isn’t guaranteed, so check that your content and implementation meet Snap’s current requirements before submitting.
After approval, the available distribution options depend on the publishing setup. A Lens may be made publicly discoverable or shared through a Snapcode or direct link, where supported. For a private preview, share it with the intended reviewers before making the experience public.
Consider the context in which people will encounter the Lens. A short instruction such as “Tap to rotate” can make an interactive animation easier to understand, especially if the main interaction isn’t immediately obvious.
Common Mistakes to Avoid When Creating AR Animations
Even a visually appealing animation can fall short if it’s difficult to use or performs poorly. Watch out for these common mistakes:
- Starting with an overly complex model: Build and test a simple version before adding detail.
- Choosing the wrong animation method: Use transform animation for simple object movement and suitable rigged animation for character motion.
- Adding too many visual effects: Keep materials and particles focused on the intended experience.
- Skipping real-device testing: Desktop previews don’t fully reproduce real tracking and performance conditions.
- Ignoring interaction feedback: Make it clear when users should tap or perform another action.
- Following outdated tutorials without checking versions: Lens Studio’s tools and workflows evolve, so verify instructions against the interface you’re using.
Planning for these issues early makes the animation easier to maintain and gives users a more reliable experience.
How Brands Can Use Custom Snapchat AR Animations
Custom Snapchat AR animations can help brands turn a message or product into something people can explore directly through the camera.
For example, a footwear brand could create a Lens that animates a sneaker in 3D when tapped. A cosmetics brand might use face tracking to demonstrate a virtual look, while a campaign could feature an animated mascot that responds to user interaction.
The right experience depends on the campaign objective. A simple branded animation may be enough to encourage sharing, while a more advanced experience could involve interactive product visualization, face tracking, or custom 3D assets.
Budgeting should reflect the actual deliverables. A simple animated Lens, a custom 3D character, and a full mobile app with AR features require different levels of design, development, and testing. The Mobile App Development Cost guide is useful when the project includes a companion app, but it shouldn’t be treated as a direct estimate for a Lens.
For a custom Lens that needs specialist modeling, tracking, or interaction logic, hiring decisions also affect the budget. The cost of an AR developer guide can help you assess that part of the work.
If a brand wants to take the experience beyond Snapchat, it may need a dedicated app or a more extensive AR solution. A mobile app development company can help scope the app-side work, while VR projects need separate planning because their interaction design and technical requirements differ from those of mobile AR.
Create an Animated Lens, Then Build on It
Making custom AR animations in Snap Lens Studio starts with a clear idea, suitable assets, and the right animation workflow. From transform keyframes to character clips, touch interactions, and face tracking, each element should serve the experience you’re creating.
Build a small prototype first, test it on a real phone, and refine it before publishing. If your roadmap includes immersive experiences beyond Snapchat, compare the requirements of AR and VR before choosing a direction. The VR app development cost guide can help you understand the budgeting differences, while Cubix’s AR/VR app development services cover custom immersive projects.
Planning a Branded AR Lens? Let's Build It Right
Contact Us
FAQs About Making Custom AR Animations in Snap Lens Studio
1. Do I need coding skills to use Snap Lens Studio?
No. You can create many Lenses using templates, visual tools, and built-in features. Coding becomes useful when you need custom interactions, specialized logic, or behavior that isn’t available through the tools you’re using.
2. Is Lens Studio free to use?
Yes. Snap offers Lens Studio as a free development tool. Check Snap’s current licensing and platform terms for details about publishing, commercial use, and any program-specific conditions.
3. How do I add custom animation to a Snapchat Lens?
Import or create the assets you need, then use an appropriate animation workflow for the effect. You can animate an object’s transform, use compatible animation clips for a rigged model, or build effects with animated textures and particles.
4. What scripting language does Lens Studio use?
Lens Studio supports JavaScript and TypeScript workflows, depending on the APIs and tools you’re using. Check the current documentation for the specific runtime and scripting setup before adapting code from a tutorial.
5. How do I publish a Lens on Snapchat?
Prepare the Lens, review its name and icon, and submit it through Lens Studio using the available publishing workflow. Snap reviews submissions, and approval is subject to its requirements.
6. Can I use 3D models from Blender?
Yes, provided you export the model in a format supported by your Lens Studio workflow. Check scale, materials, rigging, and animation compatibility after import, then test the asset in the scene.
7. How do I make my Lens perform well on phones?
Keep models and textures appropriately optimized, limit unnecessary materials and particle effects, and test on actual devices. Performance depends on asset complexity, effect design, and the capabilities of the target device.
8. How do brands use custom Lenses?
Brands use Lenses for interactive product demonstrations, virtual try-on experiences, animated mascots, branded effects, and campaign storytelling. The best approach depends on the audience and the action the experience is meant to encourage.
9. How do I track Lens performance?
Use the analytics available for your published Lens to review metrics such as plays, views, shares, and favorites. Available measurements can vary by Lens and the analytics tools currently provided by Snap.
10. What are common mistakes in Lens design?
Common problems include overly complex assets, poorly configured animation, unclear interactions, inadequate device testing, and excessive visual effects. Start with a simple working Lens and add complexity only when it improves the experience.