Building an immersive app involves more than placing 3D objects on a screen. You need to decide how users will interact with digital content, which devices the experience will support, how spatial data will be processed, and what it will take to keep everything responsive in real time.
The business case can be compelling when the experience fits the task. In its VR Soft Skills Training Efficacy Study, PwC found that participants trained in virtual reality were 40% more confident to act on what they learned than classroom learners and 35% more confident than e-learning participants. That finding illustrates how immersive technology can support practical business outcomes when it is designed around a clear objective.
This guide explains how AR/VR/XR app development works, from choosing a platform and designing the architecture to selecting a tech stack, estimating costs, testing on real devices, and preparing for launch.
Key Takeaways
- Choose the right XR approach: AR, VR, or MR should match your users’ needs and business objectives.
- Validate feasibility early: Test core interactions, device compatibility, and technical requirements before full development.
- Select the right tech stack: Unity, Unreal Engine, native SDKs, and OpenXR offer different capabilities depending on the target platform.
- Build a scalable architecture: Plan for spatial tracking, rendering, interaction logic, and backend integrations where needed.
- Budget for the full lifecycle: Account for 3D assets, device testing, performance optimization, publishing, and ongoing maintenance.
- Prioritize comfort and performance: Optimize rendering, design intuitive interactions, and handle tracking failures gracefully.
- Test on real hardware: Validate usability, performance, and compatibility before launching your AR/VR/XR application.
What Is AR/VR/XR App Development?
AR/VR/XR app development involves building applications that combine software, digital content, and spatial interaction to create experiences beyond conventional two-dimensional interfaces. Depending on the product, users may view virtual objects in their surroundings, enter a fully simulated environment, or interact with digital content that responds to the physical space around them.
Although these technologies share development techniques, they solve different problems.
1. Augmented Reality (AR) App Development
Augmented reality adds digital content to a view of the physical world. A user might preview furniture in a living room, inspect a product from different angles, or follow visual instructions while repairing equipment.
AR applications typically rely on a device camera, motion sensors, and a tracking system to estimate the device’s position and understand its surroundings. Depending on the platform and use case, developers may implement plane detection, image tracking, object tracking, lighting estimation, and spatial anchors.
The main engineering challenge is making digital content appear stable and correctly positioned as the user moves.
2. Virtual Reality (VR) App Development
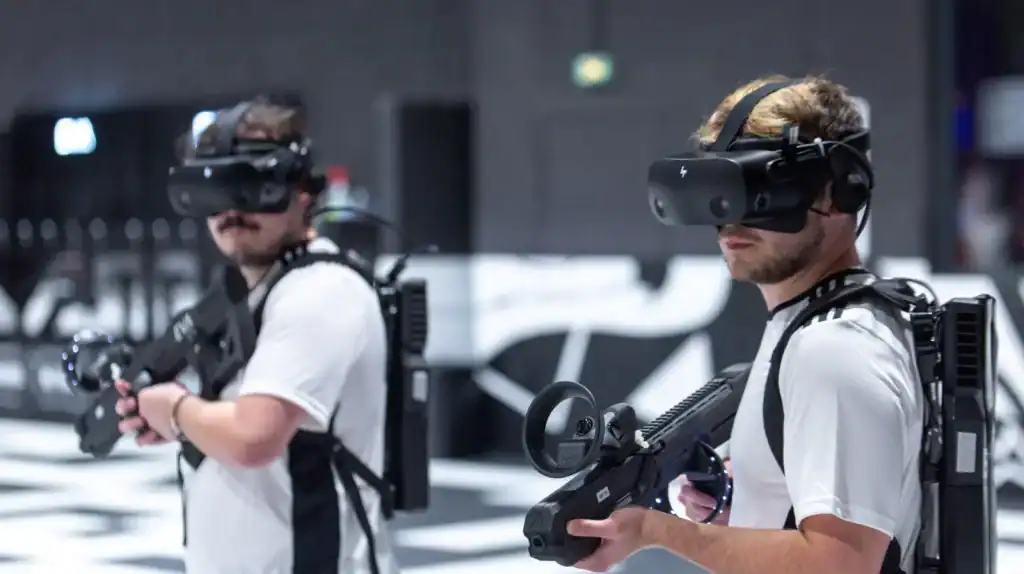
Virtual reality places users inside a computer-generated environment, usually through a head-mounted display. A VR application might simulate a factory floor, let employees rehearse emergency procedures, or create an interactive training environment.
VR development involves rendering a 3D scene from the user’s changing viewpoint, tracking head and controller movement, handling input, and designing comfortable navigation. Many applications use six degrees of freedom (6DoF), which tracks movement along three positional axes and three rotational axes.
Because users experience the environment through a headset, rendering performance, interaction latency, and motion comfort are central engineering concerns.
3. Mixed Reality (MR) and Extended Reality (XR) App Development
Mixed reality blends physical and digital environments so virtual objects can respond to the user’s surroundings. For example, a virtual machine component might appear on a real workbench and remain positioned there as the user walks around it.
Features such as scene understanding, spatial mapping, hand tracking, and occlusion handling can make these interactions feel more natural. However, their availability and accuracy vary by device and software platform.
Extended reality is the umbrella term for augmented, virtual, and mixed reality. XR application development therefore covers a range of experiences, from smartphone AR to immersive headset applications.
The right approach depends on the intended experience. A product visualization tool may work well on a smartphone, while hands-on equipment training may justify a dedicated VR or mixed reality headset. Our overview of how augmented reality is changing different industries explores where these experiences can provide practical value.
What Can You Build with AR, VR, and XR?
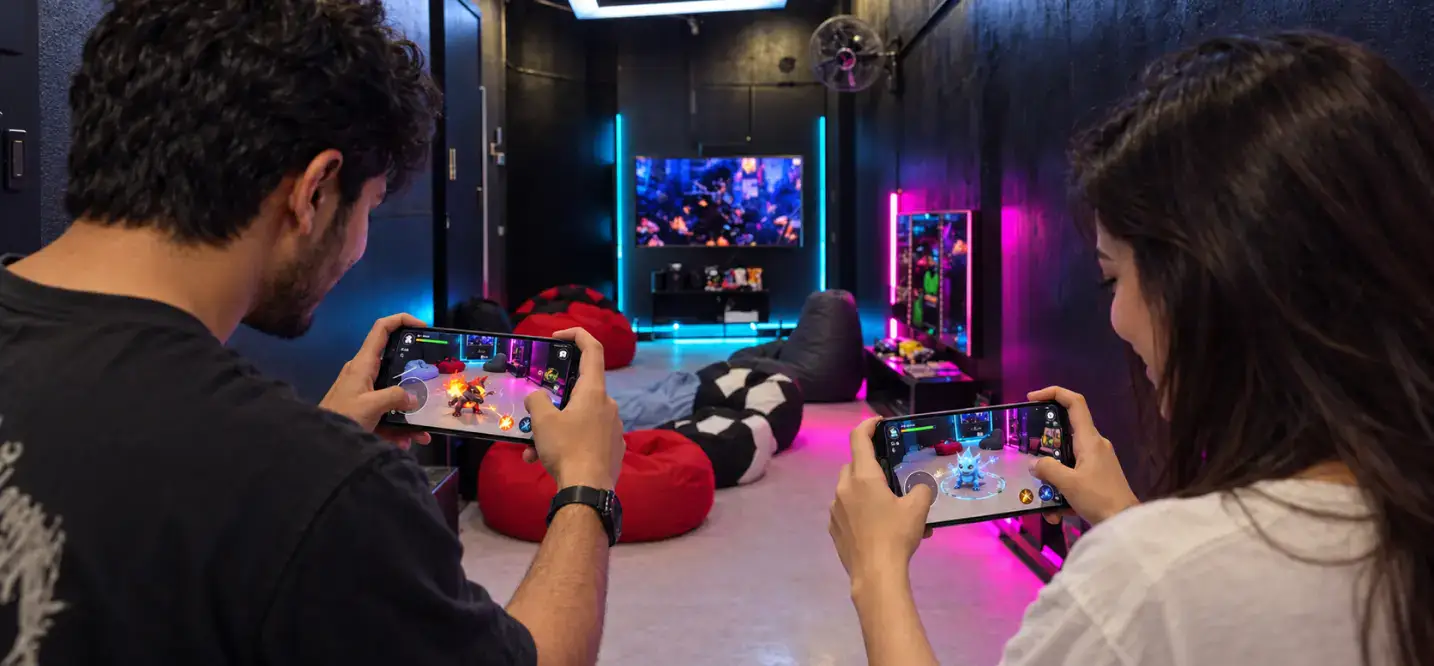 Immersive technology is most useful when spatial interaction improves a task that would otherwise be difficult, expensive, or less effective with a conventional interface.
| Industry or Use Case | Example Application | Potential Business Value |
|---|---|---|
| Retail and e-commerce | AR product previews and virtual try-ons | Helps customers assess products before purchasing |
| Manufacturing | Interactive assembly instructions and equipment visualization | Supports complex workflows and reduces reliance on static manuals |
| Healthcare | Clinical training and anatomy visualization | Enables controlled practice and three-dimensional learning |
| Education | Virtual laboratories and immersive lessons | Makes abstract concepts easier to explore |
| Real estate and architecture | Virtual property tours and spatial design reviews | Helps stakeholders evaluate spaces before construction or visits |
| Enterprise training | VR safety and emergency simulations | Provides a repeatable environment for practicing procedures |
| Entertainment | Immersive games and interactive experiences | Creates new forms of participation and engagement |
| Field service | AR-guided inspection and maintenance | Gives technicians contextual instructions while working |
The implementation should follow the business requirement, not the novelty of the technology. If a standard mobile interface can solve the problem just as well, an immersive experience may add unnecessary development and support costs.
How to Choose the Right Platform for AR/VR/XR App Development
Platform selection affects the user experience, development workflow, hardware requirements, distribution options, and long-term maintenance. Start by identifying where users will interact with the application and what the experience must do.
1. Mobile AR: ARKit and ARCore
Mobile AR is a practical choice when users need to interact with digital objects through a smartphone or tablet. It avoids requiring a dedicated headset and can support use cases such as product visualization, guided instructions, and location-independent object placement.
Apple’s ARKit supports capabilities such as motion tracking, scene understanding, and interaction with real-world environments on supported devices. Google’s ARCore documentation explains the corresponding Android capabilities, including motion tracking, environmental understanding, and light estimation.
The two platforms have different APIs, device requirements, and development workflows. If an application needs to support both iOS and Android, decide whether to use native implementations or a shared engine with platform-specific integrations.
2. VR and Headset-Based Mixed Reality
A headset is more appropriate when the application needs an immersive field of view, tracked head movement, physical interaction with virtual objects, or a simulated environment.
Evaluate the target hardware before selecting the implementation. Check its controller support, hand tracking, passthrough capabilities, display characteristics, performance limits, and distribution requirements.
For example, a training simulator that depends on precise controller input may need a different interaction design from a mixed reality product configurator that places digital components in a real room.
3. Browser-Based Experiences with WebXR
WebXR can bring immersive experiences to compatible browsers and devices without requiring every user to install a native application. It may suit interactive product demos, lightweight 3D experiences, and browser-based prototypes.
The WebXR Device API specification defines interfaces for accessing compatible XR hardware through the browser. However, browser support, device compatibility, permissions, and available features vary. WebXR should not be treated as a universal replacement for native AR or VR development.
4. Spatial Computing and visionOS
Apple’s visionOS platform supports applications built around spatial windows, volumes, and immersive spaces. The interface can combine conventional app elements with three-dimensional content.
The visionOS developer documentation describes the platform’s development approach and available frameworks. For an application targeting Apple Vision Pro, the team must plan for spatial interaction, comfortable content placement, platform-specific interface conventions, and device capabilities from the beginning.
Platform selection should also account for the rest of the product. If users need conventional mobile screens alongside immersive features, the team should plan how those interfaces will share data, authentication, and business logic.
What Does an AR/VR/XR App Development Process Look Like?
A successful project moves from a validated use case to a tested, maintainable application. The sequence may vary by product, but the following stages provide a practical framework.
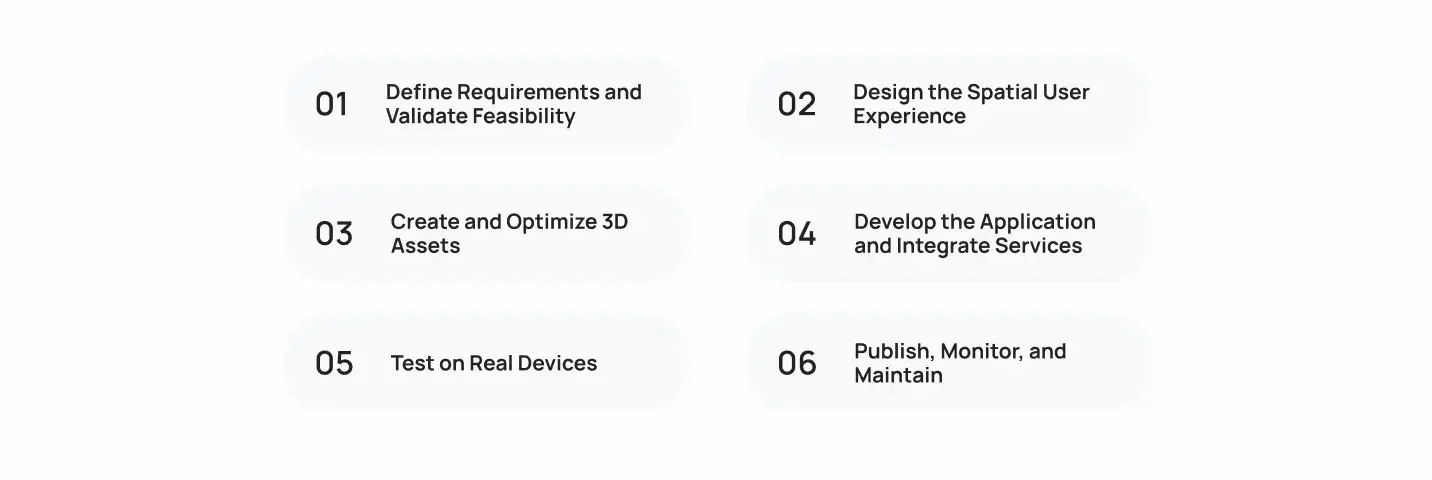
1. Define Requirements and Validate Feasibility
Start by identifying the problem the application should solve, who will use it, and how success will be measured. Establish whether the experience requires mobile AR, headset VR, mixed reality, or browser-based delivery.
Document the target devices, required interactions, expected session length, network conditions, accessibility needs, and any integration with existing business systems.
At this stage, validate technical feasibility. Confirm that the intended hardware supports the necessary tracking and interaction features. If the application depends on accurate object recognition, persistent spatial placement, or real-time collaboration, test those assumptions before committing to a full build.
2. Design the Spatial User Experience
Conventional mobile UX often revolves around screens, buttons, and scrolling. XR design must also account for physical movement, depth, distance, visibility, and how users reach or point at virtual elements.
Create interaction flows that explain how users enter an experience, select objects, move through environments, recover from tracking failures, and exit safely. Decide whether input will come from touch, gaze, controllers, hand gestures, voice, or a combination.
Prototypes should test the main interaction rather than focus only on visual polish. For example, a virtual training application should validate how users pick up tools and complete tasks before the team builds every training environment.
3. Create and Optimize 3D Assets
The content pipeline may involve 3D modeling, materials, textures, animation, lighting, rigging, and spatial audio. Assets may be created from scratch, adapted from existing CAD models, or sourced from licensed libraries.
Production-ready assets need appropriate polygon counts, texture sizes, level-of-detail settings, and material complexity. Detailed CAD models may need substantial optimization before they can run smoothly in a real-time application.
Formats such as glTF and GLB can help transfer 3D assets between compatible tools and runtime environments. The correct format depends on the engine, asset pipeline, animation requirements, and supported features.
4. Develop the Application and Integrate Services
Developers implement the scene, tracking, interaction logic, rendering, navigation, and application-specific features. They may also integrate authentication, databases, analytics, content management, payment services, or enterprise systems.
Not every XR app needs a backend. A self-contained virtual exhibit may work entirely on the device, while a collaborative training platform may require user accounts, shared session state, cloud-hosted content, and administrative reporting.
Use a modular architecture so platform-specific code does not become tightly coupled to business logic. This makes it easier to maintain the application and adapt selected features to new devices.
5. Test on Real Devices
Emulators and editor previews are useful during early development, but they cannot reproduce every aspect of real-world tracking, display behavior, thermal performance, or user comfort.
Test the experience on the target hardware. Evaluate tracking loss, lighting changes, boundary conditions, hand or controller input, scene transitions, network interruptions, and performance during longer sessions.
Include people unfamiliar with the application. They can reveal confusing gestures, difficult-to-reach controls, unclear instructions, and comfort issues that experienced developers may overlook.
6. Publish, Monitor, and Maintain
Prepare the application for the relevant app store, enterprise distribution channel, or web deployment environment. Complete platform-specific validation, permissions checks, privacy disclosures, and release requirements.
After launch, monitor crashes, performance, user feedback, and task completion. Keep SDKs and dependencies updated, address device compatibility issues, and test new platform releases before adopting them in production.
These stages share several principles with conventional software delivery. Teams can use the broader mobile app development process as a reference for requirements, development, testing, release, and maintenance.
AR/VR/XR Application Architecture: How the Components Fit Together
XR architecture connects device input, spatial tracking, rendering, interaction logic, and any required backend services. The components differ by application, but separating their responsibilities helps developers debug problems and extend the product without rebuilding everything.
1. Presentation and Interaction Layer
This layer manages what users see and how they interact with it. It includes virtual scenes, menus, 3D objects, animations, visual feedback, and interaction states.
Input handling translates touch, gaze, hand gestures, controller actions, or voice commands into application events. A modular interaction layer makes it possible to support different input methods without rewriting the entire experience.
2. Tracking and Spatial Understanding
The tracking layer estimates the device’s position and orientation and, where supported, interprets elements of the surrounding environment.
Common capabilities include:
- Six Degrees of Freedom (6DoF): Tracks position and rotation across three axes each.
- Simultaneous Localization and Mapping (SLAM): Estimates a device’s location while building or updating a representation of its surroundings.
- Plane detection: Identifies surfaces such as floors, walls, or tables when supported.
- Spatial anchors: Help maintain a virtual object’s position relative to a physical location or coordinate system.
- Scene understanding: Provides information about the environment, such as surfaces or recognized scene elements.
- Hand and eye tracking: Enables supported forms of gesture-based or gaze-based input.
These features are not interchangeable, and their availability depends on the platform, hardware, environment, and API. Developers should also plan for tracking uncertainty, temporary loss of tracking, and changes in lighting or surroundings.
3. Rendering and Content Pipeline
The rendering layer turns 3D assets, scene data, materials, lighting, and animation into the images displayed to the user.
AR applications may require occlusion handling so virtual objects appear correctly in relation to physical objects. VR applications need stable rendering from the user’s changing viewpoint. Mixed reality may combine both requirements with passthrough video and spatial scene data.
The rendering pipeline must fit the target hardware’s GPU, memory, and frame-time budget. High-detail assets are useful only when the device can render them without compromising responsiveness.
4. Application Logic and Backend Services
The application logic layer manages business rules, task progression, object behavior, permissions, and the state of the experience.
A backend becomes relevant when the product needs shared data or services such as user authentication, cloud synchronization, remote asset delivery, collaborative sessions, analytics, or administrative dashboards.
For example, a standalone AR furniture viewer may need only a catalog API and local asset caching. A multi-user industrial training platform may need role-based access, synchronized session state, content management, and reporting.
5. Security, Privacy, and Device Integration
XR applications can process sensitive information, including camera feeds, spatial maps, hand poses, eye-gaze data, and location information. Collect only what the application needs, explain why it is needed, and apply appropriate access controls, encryption, retention policies, and consent flows.
Keep hardware access behind platform APIs and isolate device-specific functionality where practical. This reduces the risk of platform dependencies spreading throughout the application.
A simple mobile AR viewer may not require every architectural layer described here. Build around the experience’s actual requirements rather than adding complexity because a technology is available.
Which Tech Stack Should You Choose for XR Apps?
The right stack depends on the target hardware, graphics requirements, interaction model, team expertise, and intended distribution channels.
| Technology | Main role | Considerations |
|---|---|---|
| Unity | Real-time 3D engine for AR, VR, and XR | Broad XR tooling, asset workflows, and cross-platform options |
| Unreal Engine | Real-time 3D engine | Useful for visually demanding experiences and advanced rendering workflows |
| OpenXR | Cross-platform XR API standard | Can reduce dependence on vendor-specific interfaces, but does not guarantee every feature works on every device |
| ARKit | Apple’s AR framework | Supports AR capabilities on compatible Apple devices |
| ARCore | Google’s AR platform | Provides AR capabilities for supported Android devices |
| RealityKit and SwiftUI | Apple’s spatial and 3D development frameworks | Relevant to native Apple-platform experiences |
| Meta XR Interaction SDK | Interaction tooling for Meta XR development | Supports common controller and hand interactions, subject to SDK and device compatibility |
| XR Interaction Toolkit | Unity’s XR interaction framework | Provides reusable interaction components and locomotion systems |
| WebXR Device API | Browser-based XR access | Useful where browser and device support meet project requirements |
1. Unity or Unreal for AR/VR Development?
Unity is often a practical choice for applications that need broad XR tooling, reusable interaction components, and a flexible asset pipeline. It can be particularly suitable for training apps, mobile AR, interactive product experiences, and applications targeting multiple device families.
Unreal Engine is worth considering when the project places substantial emphasis on high-end visual presentation, complex environments, or advanced real-time rendering. Actual performance depends on the scene, rendering settings, target hardware, and optimization work rather than the engine alone.
Compare both engines using a small prototype that tests the most demanding scene and core interaction. Consider the team’s existing expertise, asset pipeline, supported SDKs, build size, performance, licensing terms, and maintenance requirements.
For headset projects, OpenXR can provide a common API for supported XR runtimes. However, platform-specific extensions may still be necessary for features such as advanced hand tracking or vendor-specific capabilities.
2. Native SDKs or Cross-Platform Development?
Native frameworks provide direct access to platform capabilities and can be a strong fit when the application depends heavily on one device ecosystem. For example, a visionOS application may use SwiftUI, RealityKit, and ARKit to implement spatial interfaces and interactions.
A shared engine can reduce duplicated work when an application needs to run across multiple platforms. However, shared code does not eliminate platform-specific testing, interface adaptation, SDK integration, or publishing requirements.
When evaluating a shared codebase, review the trade-offs involved in cross-platform app development, particularly how platform-specific features affect architecture and maintenance.
3. Choose 3D Asset Formats and Interaction Tools Carefully
Formats such as glTF and GLB can simplify asset exchange across compatible 3D pipelines, but verify support for materials, animations, compression, and extensions before committing to a format.
For Unity projects, the XR Interaction Toolkit documentation covers reusable interaction building blocks. Meta XR Interaction SDK offers additional tools for supported Meta headset experiences, including hand and controller interactions. Select these tools based on your target platform and required capabilities rather than assuming one SDK is universally compatible.
If the application also needs conventional mobile features, evaluate how the XR stack will work with your existing APIs, authentication, data storage, and mobile frameworks. The mobile app development technologies and frameworks guide provides additional context for those decisions.
How Much Does AR/VR/XR App Development Cost?

The cost of AR/VR/XR app development depends on the experience’s complexity, target devices, asset requirements, integrations, and testing scope. A basic AR product viewer and a multi-user industrial simulator have very different engineering requirements, so a single price range can be misleading without defined assumptions.
The main cost drivers include:
- Platform and hardware coverage: Supporting several device families usually adds integration, testing, and maintenance work.
- 3D content production: Custom models, detailed environments, animation, CAD conversion, and optimization can require substantial effort.
- Tracking and interactions: Object recognition, spatial anchors, hand tracking, occlusion, and complex interaction systems can increase implementation and QA effort.
- Backend and integrations: Authentication, cloud content, real-time collaboration, analytics, and enterprise system connections add scope.
- Performance and device testing: XR applications need testing on representative hardware, including checks for frame stability, thermal behavior, tracking, and user comfort.
- Publishing and ongoing support: Store preparation, SDK updates, compatibility fixes, and post-launch improvements should be included in the budget.
A useful way to plan spending is to separate discovery, prototyping, production, and post-launch support. Validate the core interaction first, then estimate the cost of building the complete experience based on proven technical assumptions.
For a more specific breakdown of the development effort involved in augmented reality, see our guide to AR app developer costs. The estimate should reflect the features, platforms, assets, and integrations included in your own project.
How Long Does It Take to Build an AR/VR/XR App?
Development time depends on what the application must do and how much of the experience can be built using existing tools and assets.
A small prototype with a limited number of interactions may take considerably less time than a production application that includes custom 3D environments, multiple device targets, real-time collaboration, and enterprise integrations. However, there is no reliable universal timeline without a defined scope.
The main factors are:
- Number of target platforms and device configurations
- Complexity of tracking, object placement, and user interactions
- Volume and detail of custom 3D assets
- Backend services, data synchronization, and third-party integrations
- Performance optimization and testing requirements
- Accessibility, privacy, security, and distribution requirements
To create a realistic schedule, divide the work into milestones: feasibility testing, interaction prototype, production build, device QA, release preparation, and launch. Estimate each milestone after identifying its dependencies and acceptance criteria.
A working prototype should validate the riskiest technical assumptions before the team commits to the full production schedule.
Best Practices for AR/VR/XR App Development
An immersive application needs to be comfortable, responsive, and predictable, not merely visually impressive. These practices help teams avoid problems that can undermine the user experience.
1. Optimize Rendering and Frame Performance
Keep scene complexity within the target device’s performance budget. Profile CPU and GPU usage, draw calls, memory consumption, shader complexity, texture sizes, and asset loading.
Use techniques such as level of detail, occlusion culling, object pooling, and efficient lighting where appropriate. Foveated rendering can reduce rendering work in supported configurations, but its effectiveness depends on hardware, runtime support, and implementation.
Measure performance on the actual target device. A scene that runs smoothly in a desktop editor may behave differently on a standalone headset or mobile phone.
2. Design for Comfort and Natural Interaction
Avoid forcing users to make repeated, strenuous movements or reach for controls positioned outside a comfortable range. Provide clear visual feedback when users select, grab, move, or activate objects.
For VR locomotion, consider whether the experience needs continuous movement, teleportation, snap turning, or stationary interaction. Offer alternatives when possible because users differ in their tolerance for simulated movement.
Keep instructions concise and introduce unfamiliar interactions gradually. Users should understand how to perform essential actions without repeatedly leaving the experience to consult help.
3. Handle Tracking Loss and Occlusion Gracefully
Tracking may become less reliable when lighting changes, objects are obscured, or the user moves outside the system’s supported conditions. The application should respond gracefully instead of allowing digital content to jump unpredictably or become unusable.
Test spatial anchors, plane detection, object placement, and occlusion in different environments. If a feature depends on a particular surface or tracking condition, explain that requirement and provide a recovery path when the condition is not met.
4. Use Spatial Audio and Haptics with Purpose
Spatial audio can help users locate sounds in three-dimensional space, while haptic feedback can confirm actions or communicate events. Both should reinforce the interaction rather than overwhelm the user.
Keep sound cues distinguishable and avoid excessive vibration or repeated audio notifications. Consider volume controls, quiet environments, hearing accessibility, and situations where users cannot rely on audio or haptics.
5. Protect Privacy and Plan for Maintenance
Camera access, spatial mapping, hand tracking, and eye tracking can involve sensitive data. Request only the permissions needed for the feature, clearly communicate data use, and minimize retention.
Keep third-party SDKs updated, test platform changes before release, and monitor crashes and user feedback. An XR app is a maintained software product, not a one-time 3D experience.
How Do You Test and Publish an XR App?
Testing should cover functional correctness, spatial accuracy, comfort, performance, compatibility, and release readiness. The exact process depends on the target platform and distribution model.
Test Across Real Devices and Conditions
Use the intended hardware to test core interactions, tracking stability, controller and hand input, object placement, scene transitions, and error recovery. Check performance during sustained use, not only in short demonstrations.
Where applicable, test different lighting conditions, room layouts, network quality, and user movement patterns. For enterprise applications, also validate authentication, permissions, data synchronization, and offline behavior.
Prepare for Distribution
Before release, verify the platform’s current requirements for app packaging, permissions, privacy disclosures, supported SDKs, and store review. Enterprise deployments may also require device management, account provisioning, and controlled content distribution.
For browser-based XR, validate supported browsers, permissions, secure-context requirements, and fallback behavior. Users who cannot access the immersive experience should still receive useful guidance or an alternative where the product allows it.
Publishing is not the end of the process. Monitor performance and feedback, resolve compatibility issues, and plan updates as operating systems, SDKs, and hardware capabilities evolve.
How to Choose an AR/VR/XR App Development Company
An experienced development partner should be able to explain the technical decisions behind the proposed solution, not simply demonstrate attractive 3D visuals. Look for a team that can validate feasibility, choose a suitable platform, build reliable interactions, and support the application after release.
Evaluate potential partners against these questions:
- Relevant experience: Have they delivered applications for the device types and use cases you need?
- Technical planning: Can they explain the proposed architecture, tracking approach, SDK dependencies, and platform limitations?
- Prototyping: Will they test the riskiest interaction before committing to a complete build?
- Performance and QA: Do they test on real hardware and define measurable acceptance criteria?
- Cost transparency: Does the estimate distinguish discovery, 3D asset production, engineering, device testing, and ongoing maintenance?
- Long-term support: Can they handle compatibility updates, new features, bug fixes, and integrations after launch?
Review portfolios for evidence of working applications, relevant technical depth, and outcomes that match your use case. Our overview of AR/VR app development companies in the USA can help you begin comparing potential partners.
Conclusion
Successful AR/VR/XR app development starts with a clear use case and a realistic understanding of the devices, interactions, and performance requirements involved. Choose the platform based on how people will use the experience, validate the riskiest features early, and build an architecture that can support testing, maintenance, and future changes.
Whether you are developing a mobile AR product viewer, a VR training simulator, or a mixed reality enterprise application, the right engineering approach can help turn an immersive concept into a reliable product. If you need help validating your idea, selecting a suitable tech stack, or planning the build, work with an experienced AR VR app development company to scope the requirements before committing to full-scale development.
Planning an XR App? Let’s Build the Right Solution with Cubix
Contact UsFrequently Asked Questions
1. What Is the Difference Between AR, VR, and XR?
Augmented reality overlays digital content on the physical world, while virtual reality places users in a simulated environment. Extended reality is the umbrella term that includes AR, VR, and mixed reality, where digital content can interact with the surrounding environment.
2. What Does an AR/VR App Development Process Look Like?
The process usually includes requirements discovery, feasibility testing, spatial UX design, 3D asset production, development, device testing, publishing, and maintenance. A prototype should validate the most important technical assumptions before full production.
3. Which Tech Stack Should I Choose for XR Apps?
Unity and Unreal Engine are common choices for real-time 3D development. Native frameworks such as ARKit, ARCore, and RealityKit may suit platform-specific needs, while OpenXR can help with supported headset runtimes. Choose based on target devices, required features, team expertise, and performance requirements.
4. How Much Does XR App Development Cost?
Cost depends on device support, custom 3D assets, tracking, interactions, backend integrations, testing, and maintenance. A reliable estimate requires a defined scope and clear assumptions about the target platform and expected functionality. For VR-specific budgeting considerations, see our guide to VR app development costs.
5. Should I Use Unity or Unreal for AR/VR Development?
Unity may suit projects that prioritize broad XR tooling and reusable components. Unreal Engine may be a good fit for visually demanding real-time environments. Prototype the most demanding part of the experience and compare performance, workflow, compatibility, and team expertise before deciding.
6. How Long Does It Take to Build an AR App?
The timeline depends on the complexity of tracking, asset creation, interactions, platform coverage, and integrations. A focused prototype can be much smaller in scope than a production application, so estimate timelines by milestone after defining the requirements.
7. What Hardware Do I Need to Test XR Apps?
You need representative devices for the platforms you plan to support, such as compatible smartphones for mobile AR or target headsets for VR and mixed reality. Simulators and editor previews help during development, but real-device testing is necessary to validate tracking, performance, comfort, and hardware-specific behavior.
8. How Do I Optimize XR Apps for Performance?
Profile CPU and GPU workloads on the target device, optimize 3D models and textures, reduce unnecessary draw calls, and manage memory and asset loading. Test sustained performance and thermal behavior rather than relying only on editor previews or short test sessions.
9. How Do I Publish an XR App?
Follow the target platform’s packaging, permissions, privacy, compatibility, and review requirements. Depending on the product, distribution may use a mobile app store, a headset app store, enterprise deployment, or a compatible browser.
10. What Are the Best Practices for XR User Experience?
Design comfortable interactions, keep controls within practical reach, provide clear feedback, and offer alternatives for movement and input where possible. Test with unfamiliar users, handle tracking failures gracefully, and protect sensitive spatial and biometric-related data.